Installing a garage door track might seem like a complex project, but with the right guidance, you can handle it successfully. The key to a smooth garage door track installation is understanding the components, following a step-by-step process, and ensuring proper alignment throughout the project. Whether you’re replacing old tracks or installing a new garage door system, knowing the basics will save you time and prevent future problems.
Before starting your installation, you’ll need to gather all the necessary hardware including the tracks, jamb brackets, slice plates, and flag brackets. The process typically begins with removing the old door if you have one, then identifying and positioning the bottom panel of your new door. From there, you’ll assemble the tracks and connect them to the door panels with rollers inserted into the appropriate holes.
The height of your garage door tracks affects how your door operates and how much ceiling space remains available. Some homeowners with high ceilings choose to raise their garage door tracks to within 8 inches of the ceiling, while others opt for specialized setups with 20-inch radius tracks for different door movement patterns. Your choice will depend on your specific garage configuration and needs.
Understanding Garage Door Track Types
Garage door tracks are the metal channels that guide your door as it opens and closes. They come in different configurations to accommodate various garage layouts and ceiling heights.
Standard Lift vs. High Lift Tracks
Standard lift tracks are the most common option for residential garages. They run vertically up the wall and then curve horizontally along the ceiling. This design works well when you have standard ceiling height (7-8 feet) in your garage.
High lift tracks provide additional vertical travel before curving horizontally. You might need these if you have:
- Higher ceilings (9+ feet)
- Obstructions near the ceiling
- A need to park taller vehicles
High lift tracks keep your door higher when open, giving you more usable space. The amount of “lift” can be customized based on your specific requirements and ceiling height.
Both track types use the same basic components: vertical tracks, horizontal tracks, radius curves, and brackets. The difference lies in their configuration and the height at which the curve occurs.
Material Options for Tracks
Most garage door tracks are made from galvanized steel. This material offers excellent durability and resistance to rust and corrosion. The galvanization process adds a protective zinc coating that extends the life of your tracks.
Track thickness varies, with options typically including:
- 1-inch tracks (commonly used for lightweight doors)
- 2-inch tracks (standard for most residential doors)
- 3-inch tracks (for heavy commercial doors)
The gauge (thickness) of the steel also matters. Lower gauge numbers indicate thicker, stronger steel. Most residential tracks use 14-17 gauge steel.
For coastal areas or locations with high humidity, consider tracks with additional rust protection or made from aluminum. These may cost more but will last longer in harsh environments.
Choosing the Right Track for Your Garage
Selecting the appropriate track depends on several factors:
Door Weight and Size: Heavier doors require sturdier tracks. A standard 2-inch track works for most residential doors, but oversized or custom doors might need reinforced options.
Ceiling Height: Measure from floor to ceiling to determine if you need standard or high lift tracks. Standard tracks work with 7-8 foot ceilings, while higher ceilings may require high lift options.
Available Space: Consider obstructions like:
- HVAC systems
- Lighting fixtures
- Storage areas
Operation Type: Different openers work better with certain track configurations. Consult with your installer about compatibility between your chosen opener and track system.
If you’re replacing an existing door, you can often reuse the tracks if they’re in good condition and compatible with your new door. Always inspect for damage, rust, or misalignment before deciding to reuse.
Preparation Before Installation
Proper preparation is crucial for a successful garage door track installation. Taking time to gather the right tools, measure accurately, and ensure compatibility will save you headaches during the actual installation process.
Required Tools and Materials
To install garage door tracks properly, you’ll need specific tools and materials ready before you begin.
Essential Tools:
- Tape measure
- Level (4-foot recommended)
- Drill with various bits
- Socket wrench set
- Hammer
- Pliers
- Stepladder
- Safety glasses and gloves
Required Materials:
- Garage door tracks (matching your door type)
- Track brackets and mounting hardware
- Lag screws or bolts (typically 3/8-inch)
- Wall anchors (if mounting to masonry)
- Lubricant spray for rollers
Having everything gathered beforehand will prevent delays during installation. Double-check that all parts are included with your purchased track system before starting.
Measuring and Marking Track Placement
Accurate measurements are critical for proper track alignment and door operation. Start by clearing the garage door opening area completely.
Measure the width of your garage door opening at several points to confirm it’s consistent. Mark the centerline of the opening on the header.
For vertical track placement:
- Measure from the floor to where the track will begin (typically level with the top of the door)
- Mark both sides of the doorway at the same height
- Use a level to draw horizontal reference lines at this height
For horizontal track positioning:
- Measure back from the door opening to ensure adequate ceiling clearance
- Mark where brackets will attach to wall studs or solid framing
- Verify all measurements are symmetrical on both sides
Use a chalk line to ensure straight markings across longer distances.
Ensuring Garage Door Compatibility
Before installation, verify your new tracks are fully compatible with your existing garage door system.
Check that the track width matches your door thickness and roller size. Standard residential doors typically use 2-inch rollers with matching tracks.
Examine your garage space carefully:
- Measure headroom (space above door opening)
- Check side room (space beside door opening)
- Confirm backroom (space extending into garage)
These measurements must meet minimum requirements for your specific door type. For example, standard tracks typically need at least 12 inches of headroom.
If replacing existing tracks, make sure the new tracks are the same type (standard, low-headroom, or high-lift). The track radius should also match your existing setup to ensure proper door operation.
Step-By-Step Garage Door Track Installation
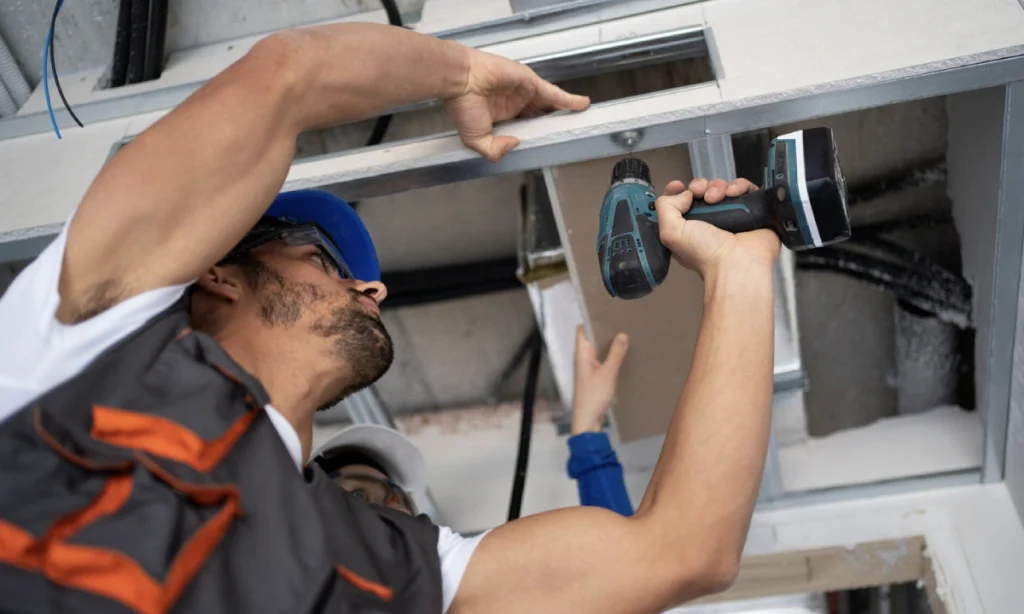
Installing garage door tracks properly is crucial for smooth operation and safety. Correct placement and alignment will prevent binding issues and ensure your door opens and closes reliably for years to come.
Attaching Vertical Tracks
Begin by identifying the right and left vertical tracks. These typically have brackets already attached and are marked with “R” and “L” respectively.
Position the bottom panel of your garage door on the floor with the exterior facing down. Attach the hinges to the top edge of the panel according to the manufacturer’s instructions.
Slide rollers into the roller brackets on both sides of the panel. Then, place the vertical track against the wall, aligning it with the rollers.
Make sure to leave approximately 1/2″ clearance between the inner edge of the track and the door. This gap prevents rubbing while allowing smooth movement.
Secure the vertical track to the wall using 5/16″ x 1-1/2″ lag screws through the track brackets. Don’t fully tighten them yet as you may need to make adjustments later.
Repeat this process for the opposite side, ensuring both tracks are perfectly vertical using a level.
Securing Horizontal Tracks
After attaching the vertical tracks, it’s time to install the horizontal tracks that guide the door along the ceiling.
Connect each horizontal track to its corresponding vertical track using the provided hardware. The connection point should form a smooth curve that guides the rollers properly.
Important safety tip: Always wear gloves and eye protection during this step as metal track edges can be sharp.
Temporarily support the horizontal tracks with ladder or rope while you work. The tracks should slope slightly upward toward the back of the garage (about 1/8″ rise per foot).
Attach the rear track hangers to the ceiling joists using appropriate lag screws. These hangers will support the weight of your door, so ensure they’re secured to structural components.
Connect the horizontal tracks to these hangers and check that they’re level and parallel to each other. The distance between tracks should match the width of your door plus 1″.
Aligning and Leveling Tracks
Proper alignment is critical for smooth door operation and preventing premature wear on components.
Use a level to ensure vertical tracks are perfectly plumb. Even small misalignments can cause binding and strain on the opener motor.
Measure the distance between tracks at several points to verify they remain parallel. The tracks should be the same distance apart at the floor as they are at the ceiling.
Check that both horizontal tracks are level with each other. Uneven tracks will cause your door to bind or operate unevenly.
Once you’re satisfied with the alignment, fully tighten all lag screws and bolts. Double-check that the track brackets remain properly positioned during tightening.
Use a straight edge along the track joints to ensure a smooth transition between vertical and horizontal sections. Any bumps here will affect roller movement.
Testing Track Movement
Before completing the installation, verify the tracks are functioning correctly to avoid future problems.
Manually raise and lower the door through its complete range of motion. The movement should be smooth without catching or binding at any point.
Listen for unusual sounds like grinding or scraping that might indicate misalignment. The rollers should glide quietly through the tracks.
Check for even gaps between the door and tracks on both sides. Uneven gaps suggest alignment issues that need correction.
Test the door balance by raising it halfway and releasing. A properly balanced door should stay in place without rising or falling.
If you encounter resistance or binding, recheck your track alignment and spacing. Make small adjustments as needed until the door moves freely.
Watch for proper roller movement throughout the entire path. Each roller should stay within its track without excessive play or wobbling.
Post-Installation Tips and Maintenance
Proper maintenance is crucial after installing garage door tracks to ensure smooth operation and extend the lifespan of your door system. Regular attention to small details can prevent major issues down the road.
Routine Inspection and Lubrication
Inspect your garage door tracks every 3 months for proper alignment and damage. Look for bent sections, loose hardware, or debris that could interfere with door movement. Clean the tracks with a damp cloth to remove dirt and grime that can cause friction.
Apply a silicone-based or lithium-based garage door lubricant to the tracks, rollers, hinges, and springs every 3-6 months. Avoid using WD-40 or grease as these can attract more dirt and cause buildup.
Check the hardware that connects the tracks to walls and ceiling. Tighten any loose bolts or screws to prevent track misalignment. A properly secured track system is essential for safe door operation.
Test the balance of your door by disconnecting the opener and manually lifting the door halfway. It should stay in place without rising or falling, indicating proper spring tension.
Troubleshooting Common Track Issues
If your door makes squeaking or grinding noises, this typically indicates friction in the track system. Apply lubricant to rollers and tracks, then check for alignment issues that may be causing the noise.
For doors that stick or bind when opening, examine the tracks for proper spacing. The gap between rollers and track should be consistent throughout. Adjust brackets as needed to maintain proper alignment.
Common Track Problems and Solutions:
| Problem | Potential Solution |
| Door off track | Realign rollers, check for bent sections |
| Uneven movement | Verify track alignment and level |
| Sagging door | Tighten hardware, check spring tension |
| Sticking in one spot | Look for track dents or obstructions |
If you notice bent track sections, minor dents can sometimes be straightened with a rubber mallet. However, severely damaged tracks should be replaced to prevent further issues.
When to Seek Professional Help
Contact a professional if you notice significant track damage like major bends or breaks. These issues can cause door failure and create safety hazards for your family.
Seek expert assistance if your door repeatedly comes off its tracks despite your adjustment attempts. This indicates a serious alignment problem that requires professional tools and expertise to properly repair.
Call a technician immediately if you hear loud snapping sounds or see broken cables. These are signs of dangerous spring or hardware failures that require specialized knowledge to fix safely.
Spring adjustments should always be left to professionals. The high tension in garage door springs can cause serious injury or death if handled improperly.
Annual professional maintenance is recommended even with regular DIY care. Technicians can spot potential problems before they become major issues and perform adjustments that require specialized training.
Ensure the Operation of Your Door System
Ready to upgrade your garage door tracks? Taking action now can prevent future issues and ensure smooth operation of your door system.
Professional installation saves time and reduces the risk of errors. Experts have the right tools and experience to handle garage door track installation correctly the first time.
Don’t wait until your garage door malfunctions completely. Early replacement of worn tracks can prevent damage to other door components and improve safety.
Benefits of professional track installation:
- Proper alignment and tension adjustment
- Correct hardware selection and placement
- Safer installation process
- Extended door system lifespan
You can often find seasonal discounts or special promotions for garage door services. Many companies offer installation specials that provide excellent value for homeowners.
When selecting an installation service, look for companies with:
- Positive customer reviews
- Proper licensing and insurance
- Warranty coverage
- Years of experience
Remember that quality tracks and proper installation are investments in your home’s functionality and safety. The right equipment installed correctly will perform reliably for years.
Schedule your consultation today to discuss your garage door track needs. Professional technicians can assess your current system and recommend the best solutions for your specific situation.
Frequently Asked Questions
Garage door track installation involves specific steps, diagrams, and hardware components that must be properly assembled for safe operation. Proper track installation ensures smooth door movement and prevents potential issues with your garage door system.
What are the steps for installing a residential garage door track?
Installing residential garage door tracks requires careful attention to detail and proper alignment. First, assemble the vertical track sections by attaching the appropriate brackets according to your door’s specifications.
Next, secure the vertical tracks to the jamb using lag screws, making sure they’re level and properly aligned with the door. The tracks should be parallel to each other and perpendicular to the floor.
Then, attach the horizontal tracks to the vertical sections using the curved track connectors. These should form a smooth transition from vertical to horizontal movement.
Finally, secure the horizontal tracks to the ceiling using rear track hangers. Make sure the tracks are level to within an inch for proper door operation.
Where can I obtain a garage door installation diagram?
You can get garage door installation diagrams from several reliable sources. The manufacturer of your garage door typically includes detailed installation instructions and diagrams in the packaging.
Many garage door manufacturers also provide installation guides on their websites that you can download and print. These diagrams show the correct placement of tracks, springs, and other components.
Hardware stores and garage door supply companies often offer installation guides with their products. These diagrams are specifically designed for DIY installations.
Professional garage door installers may also provide diagrams as part of their service documentation if you hire them for installation or repair work.
Is there an instructional diagram specific to garage door track installation?
Yes, instructional diagrams specifically for track installation are available from several sources. Most comprehensive garage door installation manuals include detailed sections focused on proper track assembly and mounting.
These specialized diagrams show the correct number of lag bolts needed, proper spacing between track brackets, and the required clearances for different door heights and types.
The diagrams typically illustrate how to achieve proper alignment between vertical and horizontal tracks. They show the critical angles and measurements needed for smooth door operation.
Many diagrams also include torque specifications for properly tightening hardware and details about track radius options for different installation scenarios.
What is involved in the installation of a garage door rear track hanger?
Installing rear track hangers is a crucial part of garage door track installation. First, you need to determine the appropriate locations for the hangers based on your door’s size and track configuration.
The rear track hangers must be securely fastened to structural ceiling joists or solid blocking, not just to drywall. This provides the necessary support for the weight and motion of the door.
Proper angles are essential for these hangers. They should support the horizontal tracks at the correct height while keeping them level or slightly pitched downward toward the back of the garage.
Most installations require multiple hangers per track for adequate support. The exact number depends on your door’s weight and the length of the horizontal tracks.
Adjustments may be needed after installation to ensure the door moves smoothly. If the door binds during operation, you might need to realign the hangers for proper track spacing.