Installing a garage door may seem like a complex project, but with the right tools and knowledge, you can save money by doing it yourself. A garage door installation takes about 4-6 hours and costs between $500-800 in materials, compared to $2,000 or more for professional installation.
The basic steps for garage door installation include measuring the opening, assembling door sections, installing tracks and hardware, and setting up the lifting mechanism. You’ll need basic tools like wrenches, a drill, and a level.
Before starting this project, make sure you can lift heavy objects and have a helper, since garage door panels can weigh over 100 pounds each. While installing a garage door requires careful attention to detail, the process is straightforward when you follow the manufacturer’s instructions.
Preparing for Garage Door Installation
Proper preparation makes garage door installation smoother and helps avoid costly mistakes. Taking accurate measurements, choosing the right door, and having all necessary tools ready will set you up for success.
Measuring the Garage Door Opening
- Take measurements at three points across the width of the opening – top, middle, and bottom. Use the smallest measurement as your door width.
- Measure the height on both sides and in the middle. Again, use the smallest measurement to determine door height.
- Check the headroom – the space between the opening’s top and the ceiling. You need at least 12 inches for most standard installations.
- Measure the side room on both sides of the opening. Most installations require 3-4 inches of space on each side for the track system.
Selecting the Right Garage Door
- Choose a door that matches your garage’s dimensions and your home’s style. Steel doors offer durability and low maintenance.
- Wood doors provide classic beauty but need more upkeep. Aluminum doors work well in humid climates.
- Consider insulation values (R-value) based on your climate. Higher R-values mean better temperature control.
- Pick a door weight you can manage, as garage doors can weigh up to 400 pounds.
Gathering Required Tools and Materials
Essential Tools:
- Level (4-foot)
- Power drill with bits
- Socket wrench set
- Pliers and wire cutters
- Locking pliers
- Hammer
- Safety glasses
- Work gloves
Required Materials:
- Track brackets
- Lag screws
- Spring hardware
- Door panels
- Rollers
- Hinges
- Weatherstripping
- Mounting brackets
Always check your door kit’s instructions for specific tool requirements.
Removing the Old Garage Door
Taking out your old garage door requires careful attention to safety and a systematic approach. Proper removal prevents damage to the garage structure and keeps you safe from injury.
Disconnecting the Door Opener
- Lock the garage door in the closed position using clamps or locking pliers to keep it from moving unexpectedly.
- Unplug the opener from the electrical outlet and disconnect the opener arm from the door. Remove any safety sensors at the bottom of the door track.
- Pull the emergency release cord to separate the door from the automatic opener mechanism. This allows you to move the door manually.
Detaching Door Panels and Hardware
- Start by removing all springs – this is the most dangerous part. If you have torsion springs above the door, hire a professional to remove them safely.
- Remove one panel at a time, starting with the top section. Unscrew the hinges connecting each panel.
- Take out the rollers from their tracks as you remove each panel. Work your way down until all panels are detached.
- Remove the vertical tracks by unscrewing them from the door frame. Take down any remaining brackets or hardware attached to the wall.
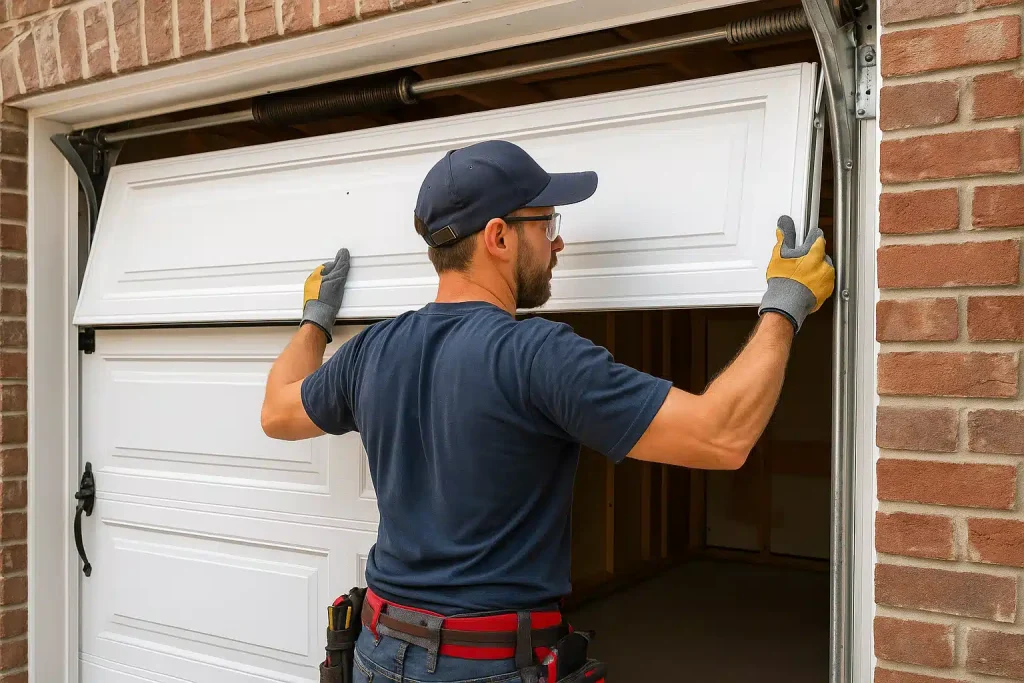
Installing the New Garage Door
Installing a garage door requires careful attention to detail and proper assembly of components. A well-installed door will operate smoothly and safely for many years.
Assembling the Door Panels
- Start by laying out the bottom panel exterior-side-down. Insert rollers into the designated holes on each panel’s sides.
- Attach hinges to the top edge of each panel. The number stamped on each hinge must match the panel number, counting from bottom to top.
- Stack panels one at a time, connecting them with hinges as you go. Make sure the panels are level and properly aligned before securing all hardware.
Important safety tip: Always wear gloves and have a helper assist with lifting panels, as they can be heavy and awkward to handle.
Securing the Tracks and Brackets
- Install the vertical tracks on both sides of the door frame. Leave the bolts slightly loose for adjustments.
- Mount the horizontal tracks to the ceiling using proper hanging brackets. The tracks must be perfectly level and parallel to each other.
- Check the spacing between tracks using a measuring tape. The distance should match your door manufacturer’s specifications exactly.
- Tighten all bolts once the tracks are properly aligned. Test the door’s movement by manually rolling it up and down.
Installing the Torsion Springs
Warning: Torsion springs are under extreme tension and can cause serious injury. Consider hiring a professional for this step.
- Mount the spring anchor bracket to the header above the door. Install the torsion tube through the end bearing plates.
- Place the springs onto the torsion tube, making sure the right spring goes on the right side and left spring on the left side.
- Secure the cable drums to each end of the torsion tube. Wind the springs according to manufacturer specifications using proper winding bars.
Attaching Handles and Hardware
- Install the emergency release rope and handle for manual operation during power outages.
- Add decorative handles to the exterior of the door if included with your kit. Position them at a comfortable height for easy access.
- Install the weather stripping along the bottom of the door. Cut it to fit precisely between the vertical tracks.
- Check and tighten all nuts, bolts, and screws. Test the door’s balance by lifting it manually to waist height – it should stay in place when released.
Testing and Adjusting Your Garage Door
Proper testing and adjustment ensures your garage door operates safely and smoothly. Regular checks prevent accidents and extend the life of your door system.
Checking Door Balance and Alignment
- Test the door balance by disconnecting the automatic opener and manually lifting the door halfway. A balanced door should stay in place without moving up or down.
- Look for any gaps between the door and frame while opening and closing. The door should move smoothly without binding or sticking.
Common Balance Issues:
- Door drops when lifted
- Door rises on its own
- Uneven movement
- Squeaking or grinding sounds
Adjust the spring tension if needed. This task can be dangerous – consider calling a professional if you’re unsure.
Testing the Garage Door Opener
- Place a 2×4 board flat on the ground under the door to test the auto-reverse safety feature. The door should reverse immediately upon contact.
- Test the photo eye sensors by waving an object through the beam while the door closes. The door must stop and reverse.
Key Safety Tests:
- Force settings
- Travel limits
- Remote control function
- Manual release mechanism
- Emergency backup battery
Final Safety and Maintenance Checks
Inspect all hardware monthly, including:
- Rollers and hinges
- Cables and pulleys
- Track alignment
- Weather stripping
- Lubricate moving parts with silicone-based spray every 3-6 months. Never use WD-40 on garage door components.
- Check and tighten all nuts, bolts, and screws. Replace any worn or damaged parts immediately.
- Listen for unusual sounds during operation. A properly functioning door should operate quietly and smoothly.
How we can help
Although you can install the garage door yourself, we always recommend hiring an expert to prevent any issues or taking advantage of installers warranties. You can reach out to us and get a quote today.
Frequently Asked Questions
Installing a garage door requires specific tools, techniques, and safety considerations. Professional installation typically costs between $500-2000 while DIY methods can save money but demand technical skills and proper equipment.
What are the steps involved in installing a garage door opener?
First, gather your tools and read the manufacturer instructions carefully. Mount the opener rail to the header bracket above the door.
Install the opener unit to your garage ceiling using secure mounting brackets and proper support chains.
Connect the opener arm to the door itself and attach the safety sensors at the bottom. The garage door opener installation process requires precise measurements and alignment.
Can I install a garage door by myself, or should I hire a professional?
While DIY installation is possible, professional garage door installation ensures proper safety measures and correct setup.
Professional installers have specialized tools and experience with different door types and sizes.
DIY installation carries risks of injury and improper installation that could damage the door or create safety hazards.
What are the typical costs associated with installing a new garage door?
Basic single-car garage door installation starts around $500 with professional labor.
Custom doors or high-end materials can increase costs up to $2000 or more.
Additional features like smart openers or insulation will add to the total price.
Where can I find a comprehensive diagram for garage door installation?
Most garage door manufacturer websites provide detailed installation diagrams with their products.
Your door’s instruction manual should include step-by-step diagrams showing proper assembly and installation.
What is the most challenging aspect of installing a garage door?
Spring installation presents the biggest challenge due to high tension and safety risks.
Proper track alignment requires precise measurements and adjustments to ensure smooth operation.
Are there any instructions or videos that detail how to install garage door hardware and tracks?
Many garage door companies provide detailed guides with visual instructions for hardware installation.
Online video tutorials show proper techniques for installing tracks, rollers, and brackets.
Always follow manufacturer-specific instructions since different brands may have unique requirements.